1. Select the widget names “Timeline” – You can choose any style you want.
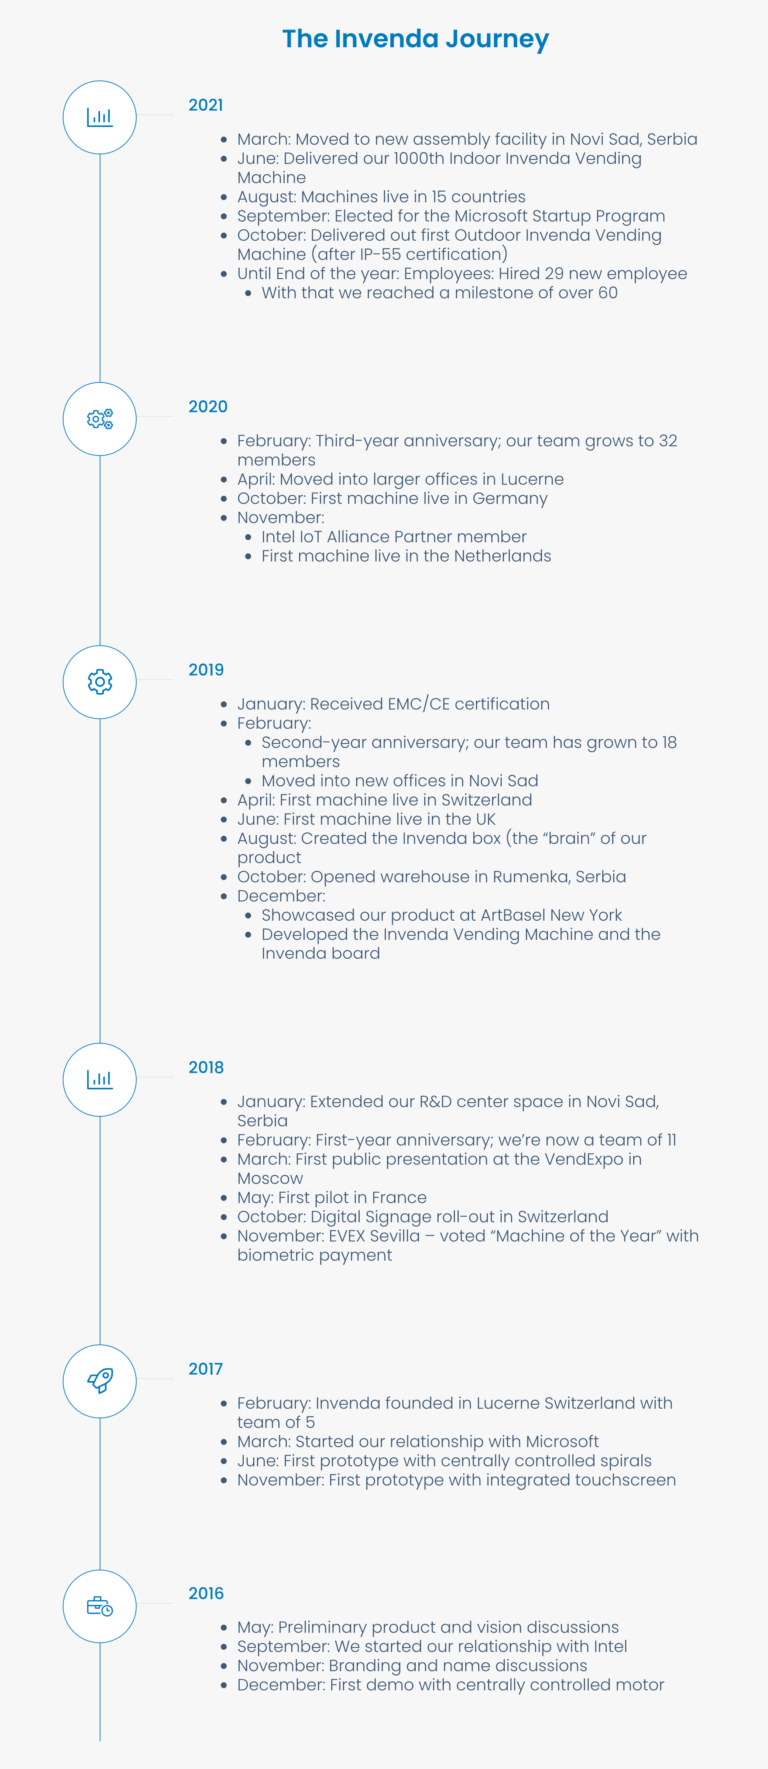
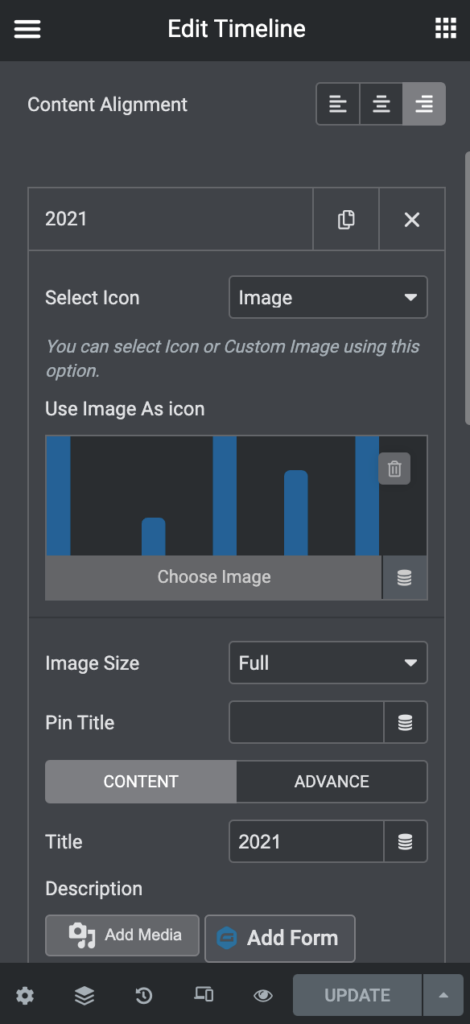
2. For this design, they want to have the image in each timeline, then you can select an icon or image depending on your mockup and attach it to there. Also, fill in the detail of time/content in each list to complete the timeline.
3. Lastly, add the custom CSS below to style the circle size, color and etc.
PS. Recommend to name the class to section, it will be easy to use for custom css.