The Problem & The Solution
Pronto Newsletters Manager plugin does not work with Elementor Website. The plugin use to manage newsletters create html template for each month.
This is for Migration website from core theme to Elementor.
There are 2 methods for solving:
- Recommend: to use a native design template of Campaign monitor mobile-friendly and support for all email platforms.
- Developer may create a master template in CM first time.
- CM email builder template customization guide
- Optional: Create custom post types (Newsletter) allow you to create newsletter content.
- Create a new campaign by the import email from the web method.
- This way not support for all email platforms.
- Risk for delivery issue.
- Developer doesn’t plan to support this feature going forward.
Who Use The Template
- Newsletter team use template builder to import the html link to client’s Campaign Monitor.
- We have to make sure the layout are not broken links, social media sharing function, Current Year are work properly after import to CM.
- To review the template we have to create a draft in CM. (Paulo Villacorte, Riza Maldo add Krizza Dungo can help to import template too)
- Have a CM sharing account? – Not for now (We might need it because we have to test several times during implement the template. Let me know again I can share my account with you)
- Reference: Campaign Monitor HTML email template
How to Create Custom Post Types in WordPress
Easy way to create a custom post type in WordPress is by using a plugin. This method is recommended for beginners because it is safe and super easy.
- Go to CPT UI » Add / Edit Post Types to create a new custom post type. You should be on the ‘Add New Post Type’ tab.
- Provide a slug, the plural and singular names for your custom post type
- Next comes the post type settings use the each option as default except option list below:
- Post Type Description: Use to manage newsletters
- Show in Nav Menus: True
- Has Archive: False
- Hierarchical: True
- With Front: False
- Menu Position: x
- Menu Icon: dashicons-email-alt
- Support Setting > Checked boxes
- Title
- Custom Fields
- Revisions
- Page Attributes
Create a custom field
Create a custom fields assigned to Newsletter post type. So user able to select post object to display for each month.
- Go to Custom Fields > Add New Field Groups: Newsletter
- Field Type: Post Object
- Label: Newsletter Posts
- Field Name: newsletter_posts
- Filter by Post Type: Post
- Filter by Taxonomy: Leave blank
- Return Format: Post Object
- Select multiple values? – Enabled
- Setting
- Show this field group if: Post Type is equal to > Newsletter
- Presentation: High (after title)
- Group Setting: Active
Create Single Email Templates
All you need to do is create Single Newsletter Template.
- Under Templates > Add New, from the dropdown select Single Post, give it a name [Single] Newsletter], and click Create Template.
- Design template.
- Copy html structure from current site header, banner and footer.
- Make sure to update all urls, image to a new site.
- Adjust font family and colors
- Note: The global setting fonts and colors are note able to render in CM. we have disable connect it with Globle theme setting and use as singular css.
- The post content part use dynamic posts feature to build archive lists of articles. See how to how to setting Dynamic post widget
- Edit any elements as you’d like. After you’ve finished designing, click Publish.
- Choose a Condition: Newsletter
Select a default font to make sure your emails render pixel perfect on every device and browser.
For Campaign monitor prefer to Helvetica, Arial, Verdana, Georgia and Times.
For Campaign monitor prefer to Helvetica, Arial, Verdana, Georgia and Times.
					table {
	margin: 0;
	border-collapse: collapse;
}
table td,
table th {
	border: none;
	padding: 0;
	vertical-align: middle !important;
}
.ReadMsgBody {
	width: 100%;
	background-color: #ffffff;
}
.ExternalClass {
	width: 100%;
	background-color: #ffffff;
}
body {
	width: 100%;
	background-color: #ffffff;
	margin: 0;
	padding: 0;
	-webkit-font-smoothing: antialiased;
	color: #000000;
}
@media only screen and (max-width: 640px) {
	body[yahoo] .deviceWidth {
		width: 440px !important;
	}

	body[yahoo] .deviceFixWidth {
		width: 370px !important;
	}

	body[yahoo] .center {
		text-align: center !important;
	}

	body[yahoo] .footerLinks {
		width: 32%;
		margin-bottom: 40px;
	}
}

@media only screen and (max-width: 479px) {
	body[yahoo] .deviceWidth {
		width: 280px !important;
	}

	body[yahoo] .deviceFixWidth {
		width: 210px !important;
	}

	body[yahoo] .center {
		text-align: center !important;
	}

	body[yahoo] .footerLinks {
		width: 32%;
		margin-bottom: 40px;
	}
}
body {
	background-color: #F0F0F0;
}
.main-header {
	background-color: #ffffff;
}
.main-footer {
	background-color: #58BDE5;
}
h1,
h2,
h3,
h4,
h5,
h6,
h1 a,
h2 a,
h3 a,
h4 a,
h5 a,
h6 a {
	color: #1e1712;
}
*,
p {
	color: #777777;
}

a {
	color: #94bd0d;
}
.newsletter-button {
	background-color: #a5bc3e;
	border-color: #a5bc3e;
	color: #5e5e5e;
}
.tagline {
	color: #000000;
}
.newsletter-masthead {
	background-color: #94bd0d;
}
a.whiteLink {
	color: #ffffff;
	text-decoration: none;
}
a.NOunderline {
	text-decoration: none;
}
.elementor-widget:not(:last-child) {
	margin-bottom: 0;
}
.dce-posts-wrapper article:first-child .dce-img img {
	height: 220px;
}
.dce-posts-container .dce-post-image .dce-img img {
	height: 180px;
	object-fit: cover;
}
.dce-posts-container .dce-post-button a:hover {
	background-color: #79832F !important;
}
Dynamic Posts widgets setting
It’s required Dynamic Plugin.
- Drag Dynamic Posts widgets to edit section area
- Skin: Grid
- Add these items
- Featured image
- Title
- Content Type: Content
- Read more
- Query >ACF Relationship field: newsletter_posts
- Results per page: 5
- Order by: Menu Order
- Order: Ascending


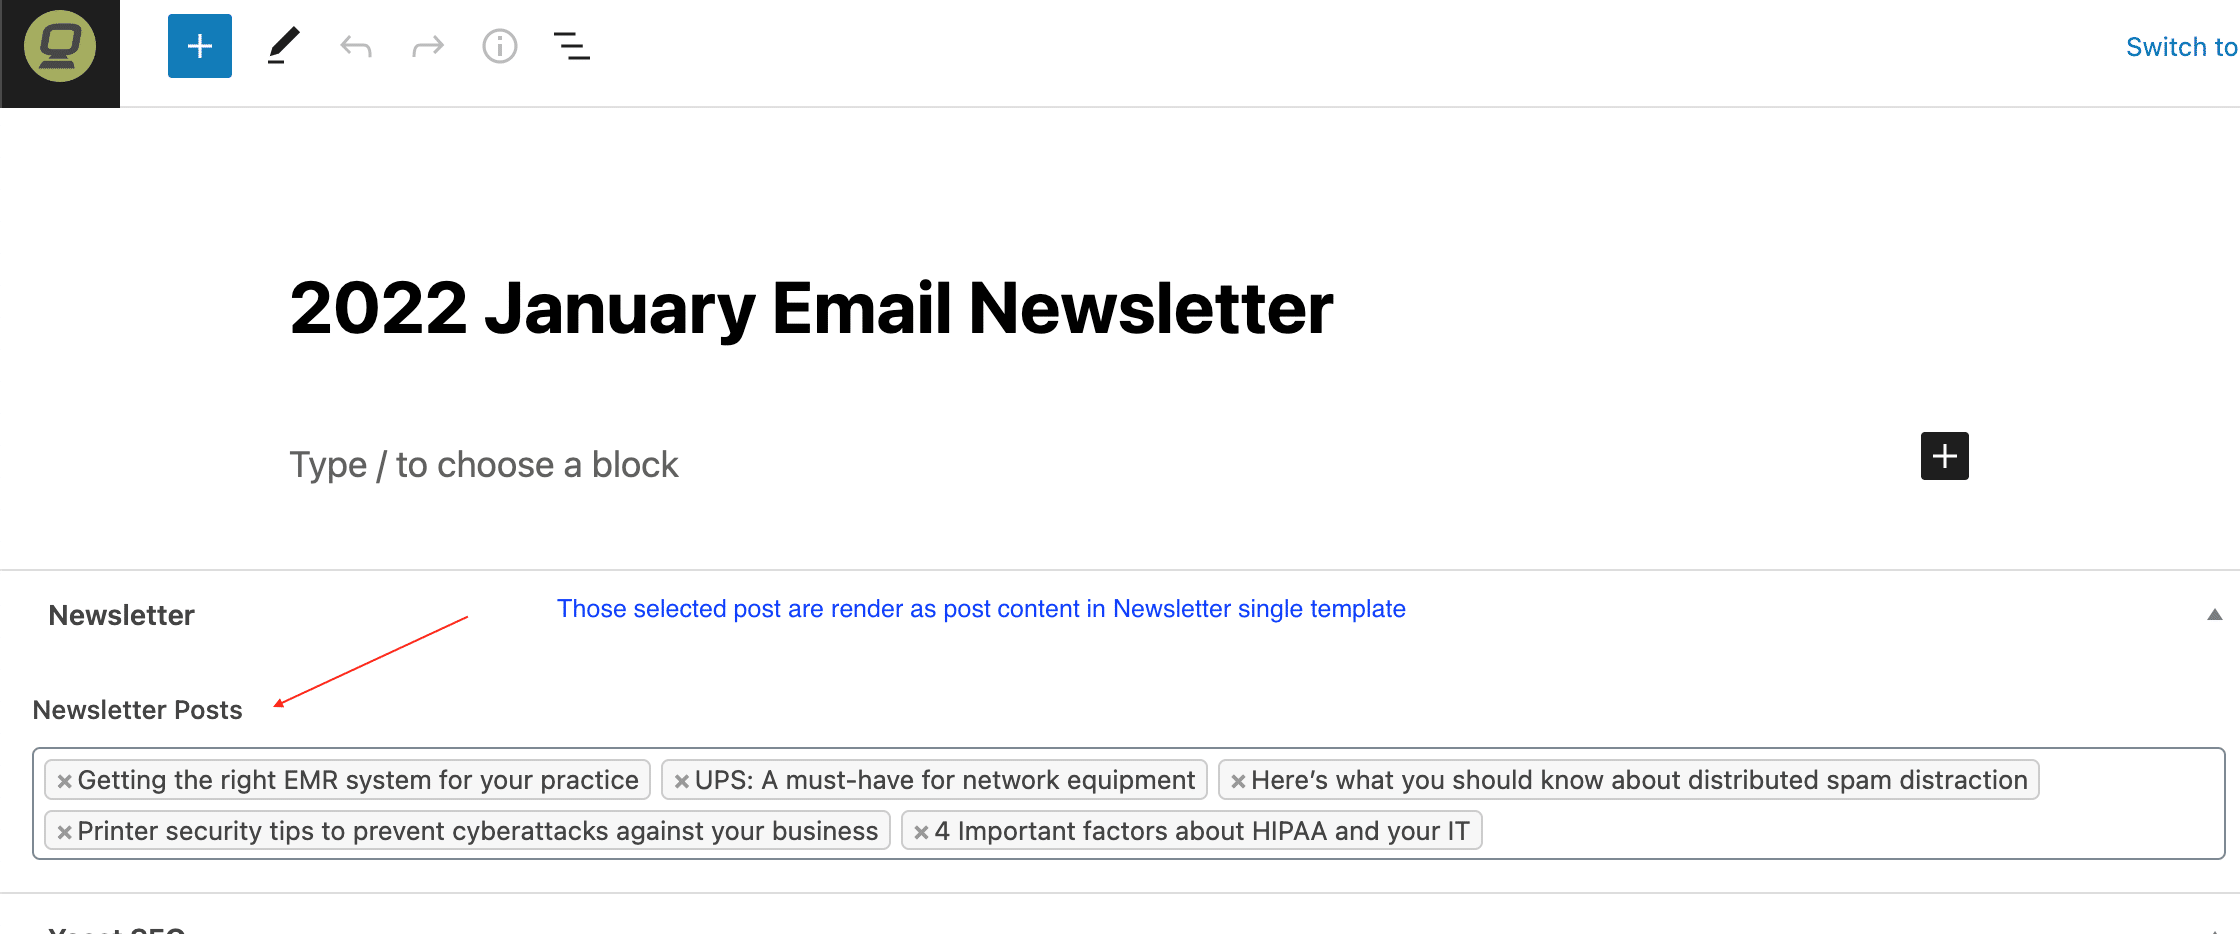
How to add Newsletter
- Go to WordPress dashboard > Newsletter > Add New
- Fill out a title
- At Newsletter Posts type input field find your post name and there are support multiple posts.
- Click Publish.
- Import url template to your campaign.

