Auto-shrink fixed header

How to?

  1. Assuming that you already create a header section with a specific class name
  2. To make the section stick to the top of the page you can use the built-in settings at Advanced > Motion Effects > Sticky
  3. Open the browser inspector tool you will see that once the header is sticky to the top, there will be a class “elementor-sticky–active” added to the section this is where we will add CSS to make the “Shrink” effect please see the comment in CSS code below
				
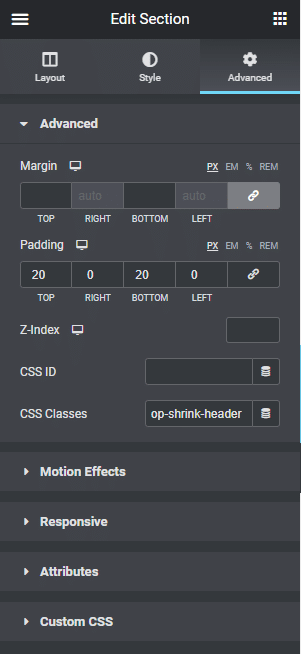
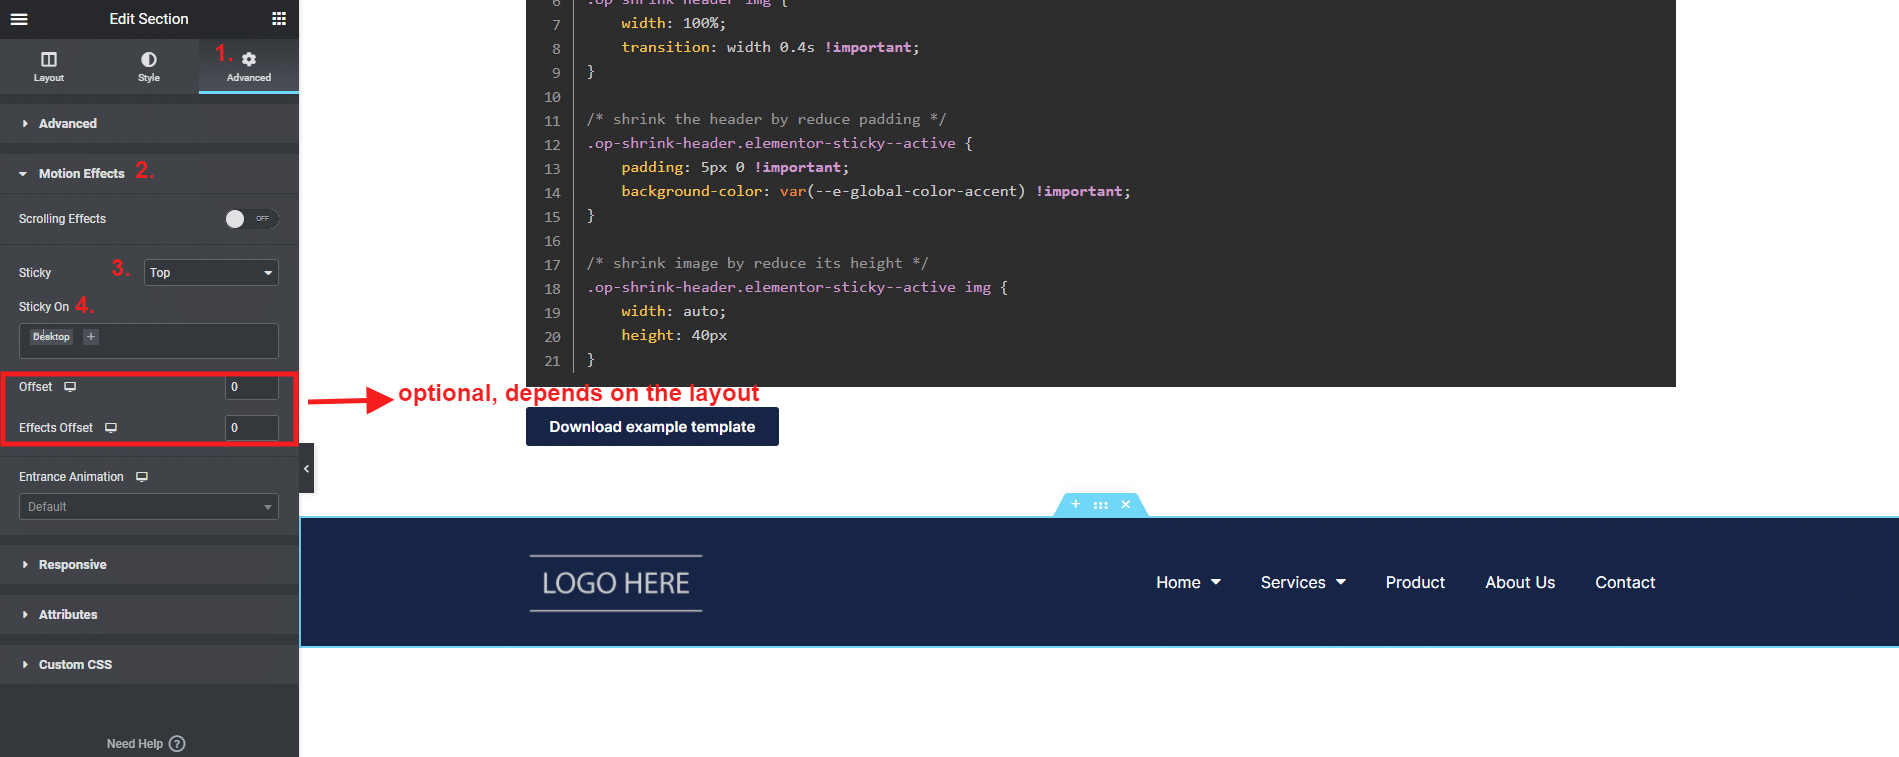
					/* add transition to normal state on both header and logo */
.op-shrink-header {
    transition: background-color 0.4s, padding 0.4s !important;
}

.op-shrink-header img {
    width: 100%;
    transition: width 0.4s !important;
}

/* shrink the header by reduce padding */
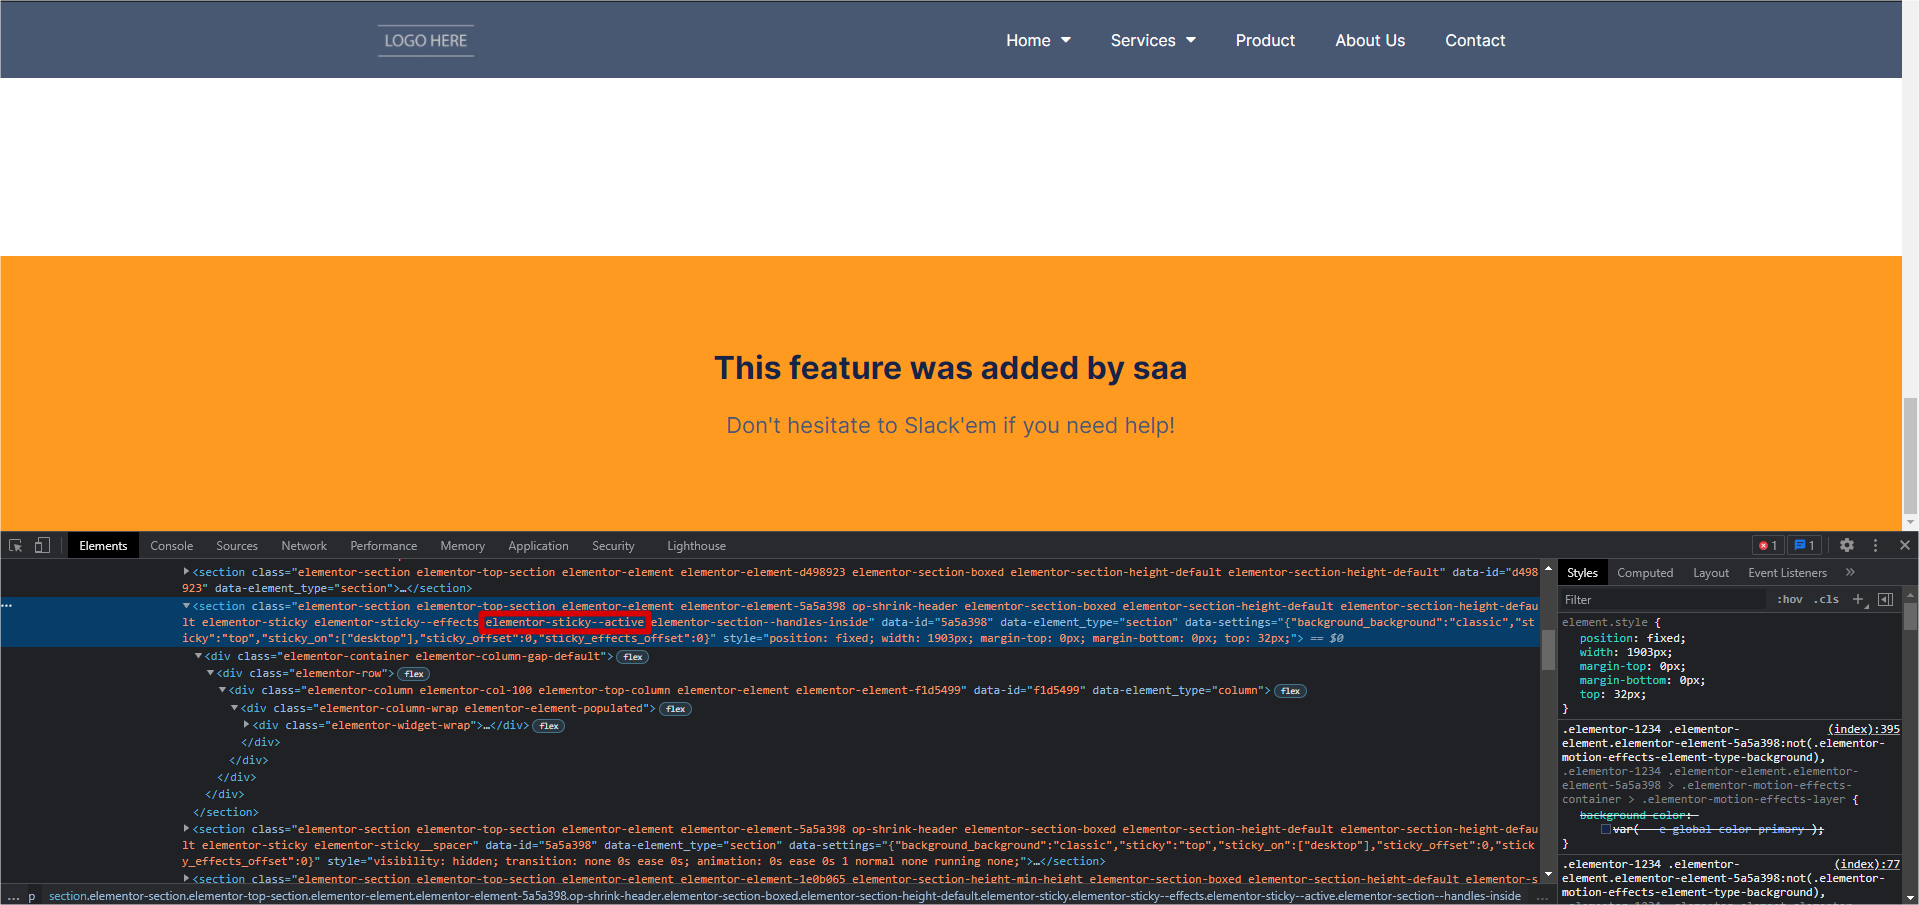
.op-shrink-header.elementor-sticky--active {
    padding: 5px 0 !important;
    background-color: var(--e-global-color-accent) !important;
}

/* shrink image by reduce its height */
.op-shrink-header.elementor-sticky--active img {
    width: auto;
    height: 40px
}


Example: